How to create Instagram reels the easy way: in Canva!
By Julia Sames | May 30, 2023
Listen. Some people (heathens) like to edit TikToks and Instagram reels on their phones. I, for one, have fat thumbs and cannot stand squinting at my phone and furiously trying to slide text around on the screen. For a year, I’ve been in search of free software that I can use to edit TikToks and reels on my laptop. And I found it hidden in plain sight: Canva!
As someone who makes dozens of reels a month, I’ve now toyed around quite a bit with Canva’s reel editing function and effects.
Upon first use, I was frustrated that I couldn’t get text assets or graphics to enter and exit the screen within a certain time frame. They entered, and then just hung around for the entirety of the video.
But now I’ve unlocked the secret, and I’m ready to tell you all about it! It all lies in *splitting pages.* Cue applause!
Here’s a step-by-step example of how I use this feature to create seamless transitions for my reels. This trick can be applied to essentially any video style.
Step 1: Get all your assets uploaded
In this case, I’m uploading two videos I took, a block of text, and a royalty-free song straight from Canva’s audio library. You can always add music later in Instagram, or upload your own mp3 file.

Step 2: Arrange and style text
I want my text to flow into the video line by line, so I’m going to arrange the quote into separate text boxes and style it to fit within Instagram’s UX.
Remember to leave some cushion on the sides for the like and comment buttons, plus at least 220 pixels at the top for the word “Reels,” and 450 pixels at the bottom for your username and caption preview.

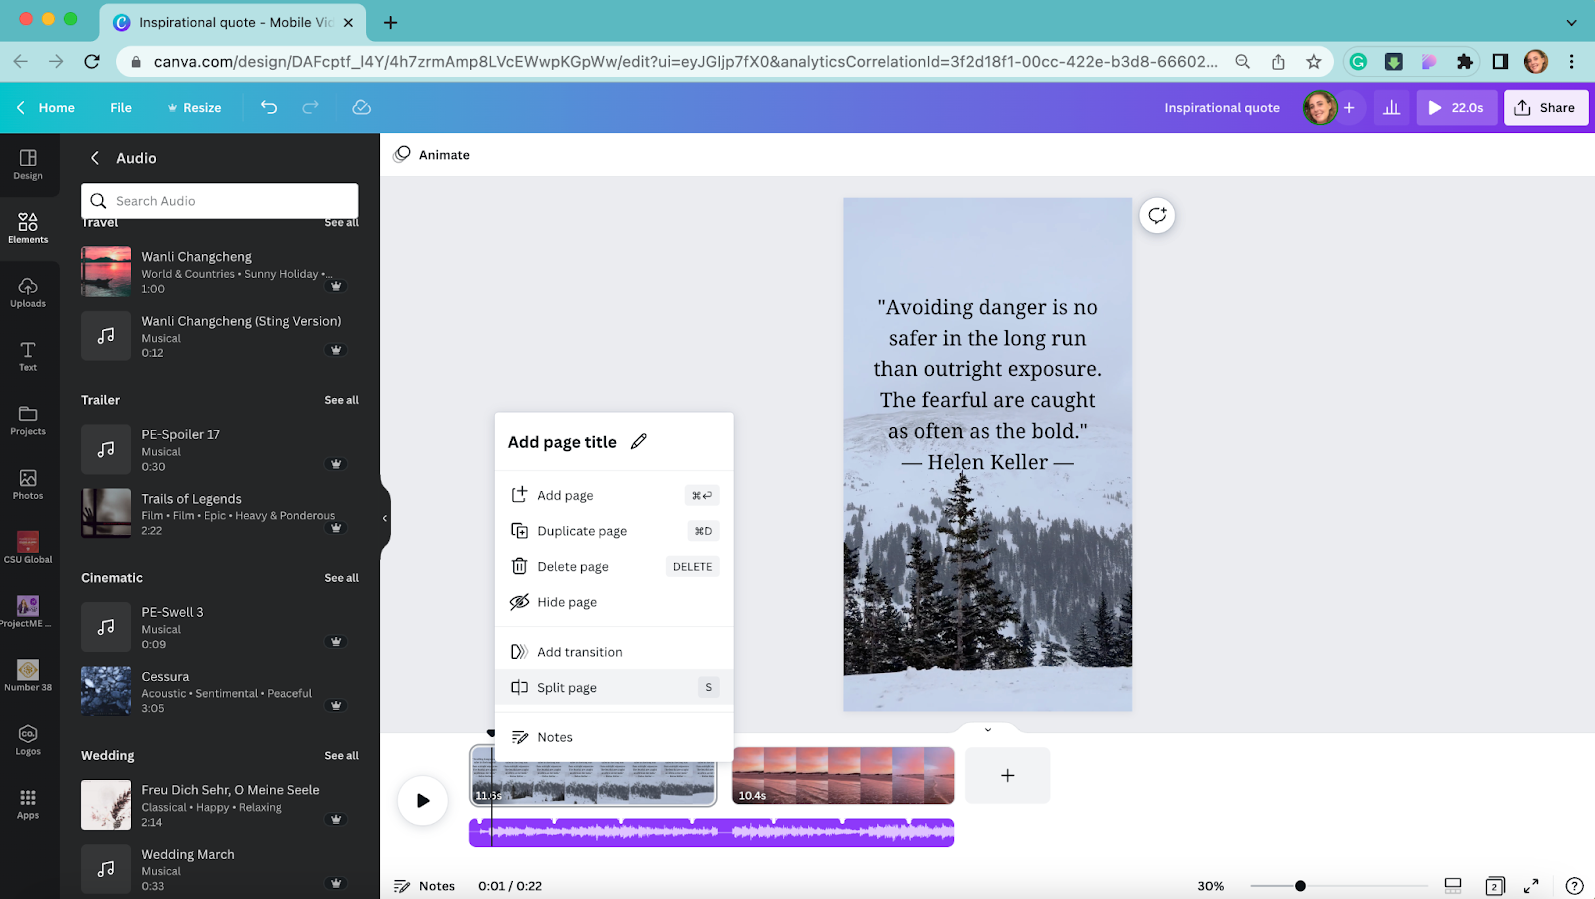
Step 3: Start splitting the pages
Here comes the fun part. I’m going to split my video into one-second increments so that each line of the quote appears a second at a time. You can of course choose any time increment you like.
You do this by moving your mouse over the video at the bottom of the screen, right-clicking, and then selecting “Split image.” You can also just hit the “S” key when the toggle is in the right place.
If you want to make your transitions seamless, don’t shorten either of those clips. They may look broken up in Canva, but they will play in what looks like one smooth take.
Bonus tip!
If you want your text to appear on the beat of a certain song, I like to use a beat per minute counter. All you do is tap along to the beat of the song while it’s playing, and the bpm will appear on the screen. If the bpm is 60, easy, just split your video into one-second increments. If the bpm is 90, you’ll split the video into .75 second segments. 120 bpm = .5 second segments. And so on!
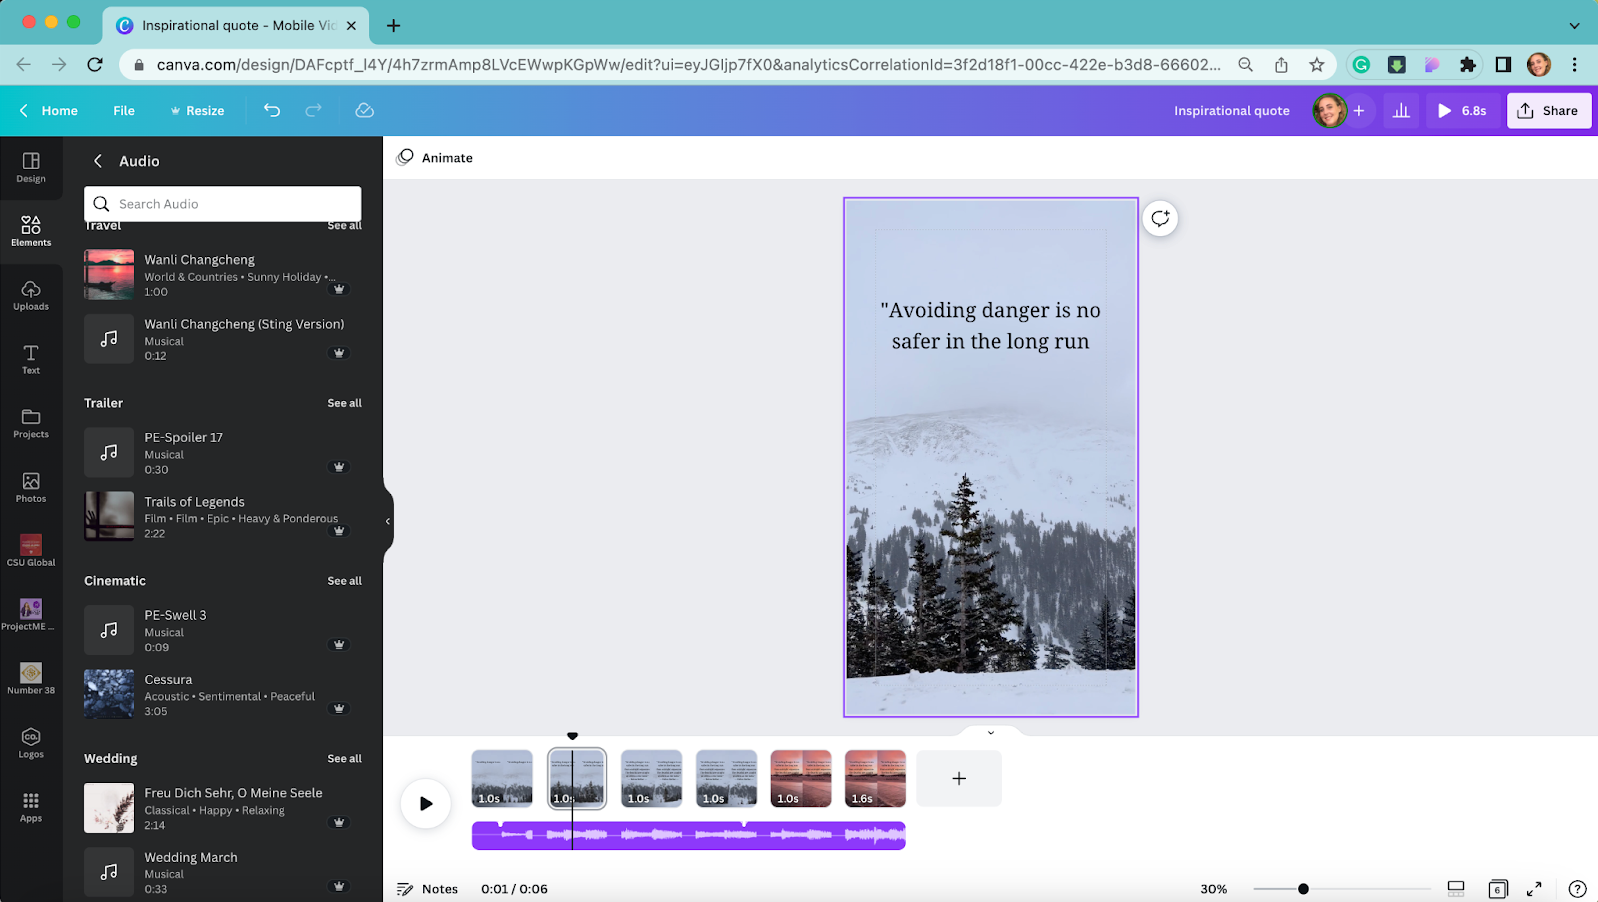
Step 4: Edit down the video
Now that you have a feel for how long your video needs to be, pare down your footage. In this case, I want four lines of text to appear on the first clip, and the last two lines of text to appear on the second, with a bit of a buffer at the end so people have time to read it. So that will be four one-second videos of the snow, a one-second video of the sunset, and then a 1.6-second video of the sunset.
It’s important to delete unnecessary footage only from the end of your video, rather than from the middle, if you want to keep the transitions smooth. Unless you’re going for a choppy look, in which case you won’t need to worry about this!
If your text isn’t already on all of your slides, just copy paste it.

Step 5: Delete some text
Because I want my text to enter in line by line, the first slide should only have one line of text, the second slide two lines, etc., etc.
I’m also going to change the font color on the last two slides so that it reads more easily.
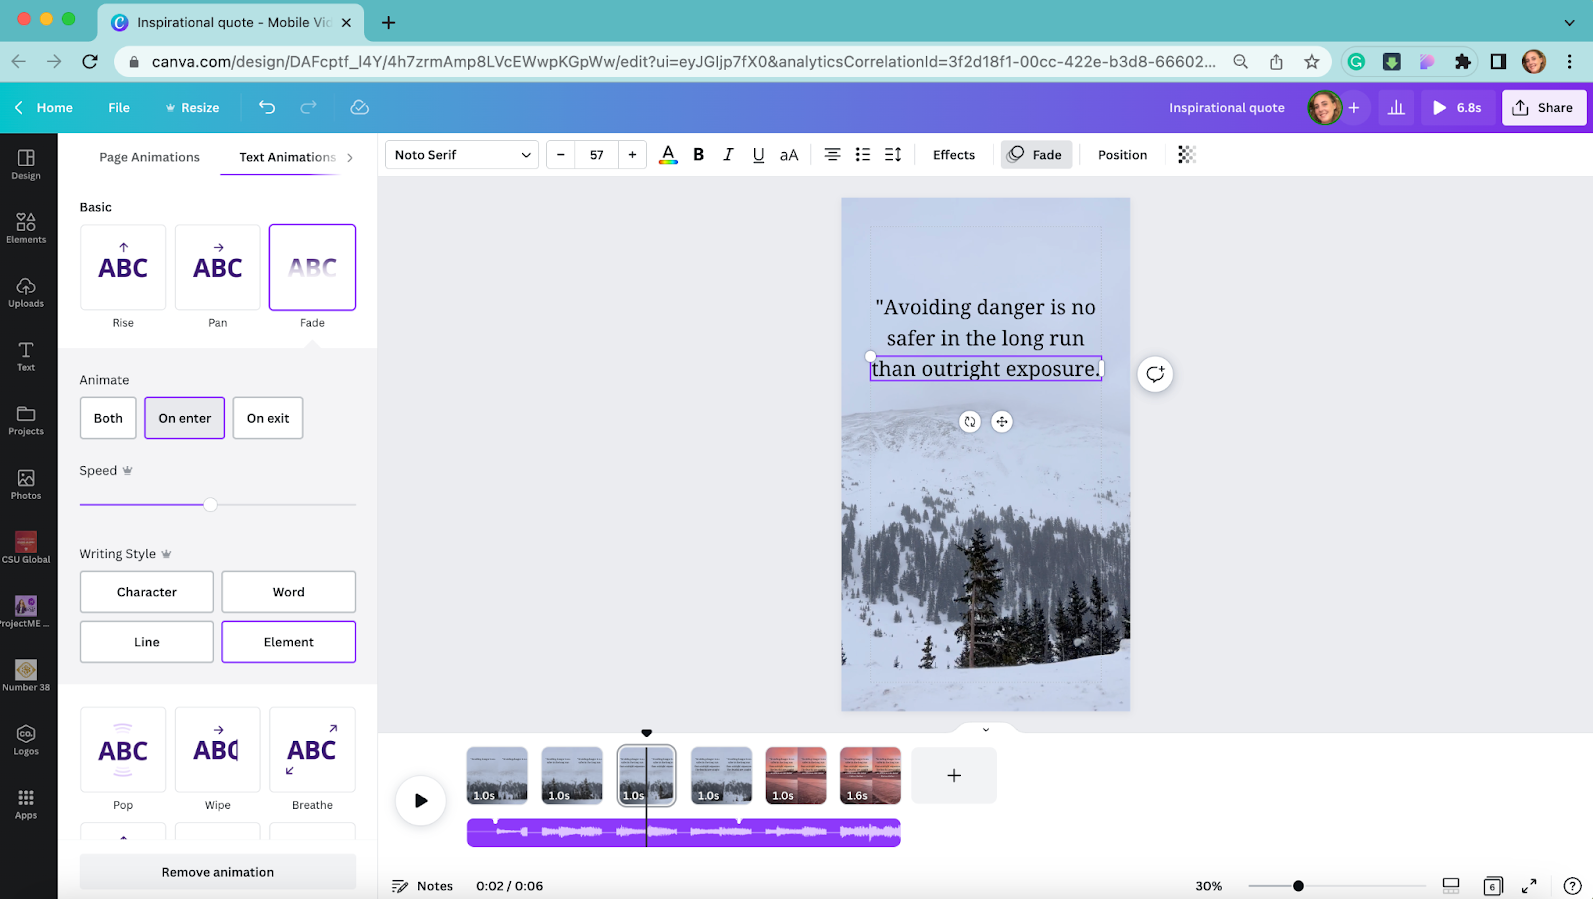
Step 6: Animate
Now you’re ready to animate your text! Select only the line of text that hasn’t appeared on the screen yet. So for the first slide, that would be the first line of text. For the second slide, it would be the second line of text. And so on.
Because I want people to be able to read the whole quote at the end, I’m going to make sure the text is only animated *on enter.* That way it won’t disappear on the next slide.
Repeat for all slides.
Step 7: Ta-da!
You now have a beautifully edited reel, no squinting necessary!
Be forewarned: Sometimes when I play my video back within Canva, the transitions look extremely choppy. Try playing it back a second time, and usually it has sorted itself out. Either way, it won’t affect your final product once you download it.
So without further ado, here’s my finished reel!
Canva also lets you add transitions between slides, stickers, animations, a wide range of fonts, backgrounds, and all the other great assets that they have to offer for graphic design.
However, the editing capabilities are still not quite as advanced as those of CapCut and Splice. For instance, Canva doesn’t allow you to speed up or slow down your video clips, add auto captions, or include trending templates and memes. (At least at the time of writing. What are the chances they see this and add these features for me? 😅)
Ultimately, use the editing program that feels most natural to you. And if you feel most comfortable on a desktop, you’re welcome!
If editing video footage just isn’t your thing, check out our Reels package! We research trends, shoot all the video footage, edit it, and post it for your company. Interested? Learn more here!

Julia Sames
Julia is a Content Creator for AMR. Julia has always loved reading, cooking extravagant meals, and essentially all activities that take place on or near the water. But now that she lives in Boulder you can add hiking uphill to that list, too.